You’ve figured out it’s time to replace
your timing belt. And you have found the exact tools for timing belt
replacement. What comes next is the procedure. If you’re a car enthusiast, you
would probably do it by yourself. But if you have moderate knowledge on doing
this, you would be tackling with this challenge. Usually, it would take eight
hours for an untrained professional to do the whole procedure.
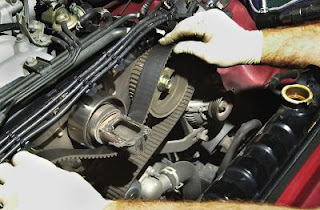
So, let’s start by removing the old timing
belt. But do remember to first refer to your manual for proper procedures. Car
models vary from the tools and the procedure of timing belt removal. But in
general, you should:
·
Engage the emergency brake.
·
The car should be jacked up
with jack stands.
·
The negative terminal of the
battery should be disconnected for safety purposes.
·
The transmission should be
placed to neutral.
·
Don’t forget to remove all
spark plugs.
·
All plastic shields underneath
the engine should also be removed.
·
Drain coolant.
·
All cooling fan and its
covering on the engine’s front should be detached. This is usually done by
turning right to loosen.
·
For easy reassembly, cooling
hoses disconnected should be labelled.
·
Remove radiator, engine drive belts, cap and
rotor, water pump pulley, and the bolts holding the upper timing belt cover.
·
On the center of the crankshaft pulley, place
the socket. Rotate engine to TDC (Top Dead Center). This means the first piston
in an inline engine is already at the top. A mark will show the TDC on the
pulley and engine.
·
The crankshaft pulley bolts
should be loosened to remove the pulley and vibration damper.
·
Take off the lower timing belt
cover.
·
Remember to mark the location
of the main tensioner bolt.
·
Now, remove the bolt which
holds the tensioner and timing belt cover and the main adjustment bolt for
tensioner.
·
The freed tensioner and
tensioner spring should be removed next.
·
Once all these are done, the
belt comes off.
At this point, removing the old timing belt
is complete. We’ll discuss the next part on the next article. J


